My Guitar Page
Since I was a kid, I've always been fascinated with the process of making things, particularly, things made of wood. Since my teens, I've developed skills as an amateur woodworker. I learned to play guitar starting at 11 yrs old, and thought it would be fun to make a guitar from scratch using mostly hand tools. I've completely dog-eared my copy of William Cumpiano's "Guitarmaking; Tradition and Technology". It's my 'bible' on guitar making. Here's how I'm doing so far....
Tuesday, January 31, 2006
Side Bending

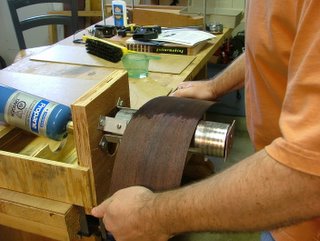
Of all the hand performed operations, side bending was the most challenging. Not to mention the fact that I have no spare side panels, this had to go very well. Fortunately, the first one wasn't mangled though had a couple of challenging spots, and turned out ok. The second went much easier, as I began to develop the feel as to where and when to focus pressure as the wood became pliable under heat. In this picture , I'm working on the second side, lower bout.
Monday, January 30, 2006
More Tools!!
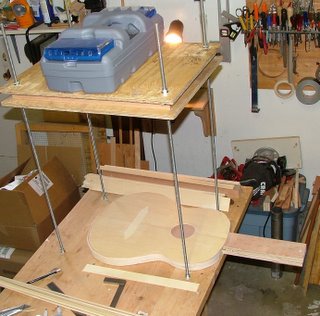
 As I mentioned earlier... there are many tools to make. This is called a 'Go-Deck' clamp. Essentially two flat surfaces (the workbench and the plywood sandwich above) kept a distance apart, in this case using threaded rods . Clamping is achieved by placing flexible rods between the upper plate and the parts you want to put pressure on.
Back panels, bookmatched and edge glued
 Part of the fun in making the guitar is also making tools to aid in construction. This simple clamping fixture was made from a shipping skid that was broken apart and used for parts (Thanks, Greg!!). As you can see in the photo, I follow and old woodworkers motto: "you can never have too many clamps".
Tuesday, January 24, 2006
Saturday, January 21, 2006
In the beginning....

... I had to make a tool to support the guitar body when it's being assembled. The plans for both this clamping tool and the guitar are from William Cumpiano's book "Guitarmaking, Tradition and Technology" which is to my understanding, the bible on guitarmaking. It is an exhaustive and comprehensive work, offering even the novice luthier (that's me, too) expert direction in proceeding with their project.


